How to create a free day planner that perfectly fits your unique needs.
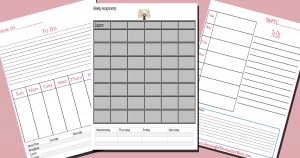
There are homeschool day planners everywhere. The choices are overwhelming. They all look so neat and tidy, holding promises of well organized, smoothly flowing days where nothing falls through the cracks. The problem is I always ended up trying to fit our life into someone else’s planner design and it never worked out quite as well as the promises.
The reason there are so many planners is the same reason there are so many self-help books. They were created by someone else, based on what works for them, but they have no idea about your particular needs or lifestyle. So they are never quite the perfect answer we’re looking for.
Just for you, I’ve created a series of free modular planner components that you can mix and match, resize and rearrange however you’d like in order to make the perfect planner for your specific needs. All you need is thisdownload, a photo editing program, and the directions below. If you can open a photo on your phone and crop it or add text over it, you can do this.
The best part is you don’t have to buy a whole planner just to give up on it a few weeks down the road. Or, worse yet, suffer with something that doesn’t fit your needs but you hate to replace because it cost so much. Making and printing your own planner is cost effective, fun and very satisfying.
The first thing you need is The Successful Homeschool Mom Ultimate DIY Planner file. It is a zip file full of 8 different modules, one for each of the most useful sections of any homeschool planner.
There is:
A calendar you can use in portrait or landscape mode
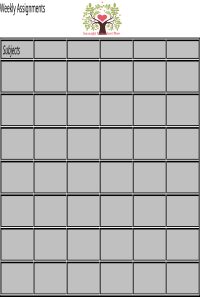
Weekly Subject planner – useful for scheduling all the kids assignments on one page for each day or you can use one page and schedule a whole week for one child.
Chore Chart
Menu Planner in two version: a single piece to put on one page, or two pieces to spread across two pages.
A place to write down the week’s memory verse
To-do list
A Journaling box for those of you who like to keep a daily portfolio type record of what the children did that day outside of book work
Each module is a .jpg, which is a picture file. They work just like any photo, you can crop them, resize them, rotate them, add a colored background, and add text over them. Click here to get The Ultimate DIY Homeschool Planner Modules
You will also need a free simple, basic photo editing software like Canva, PikMonkey, GIMP, or Paint.net. Any one you like will work as long as you can open a blank page, import multiple images onto that one page, rotate or resize the images, add text over them, and download the finished page for printing.
Unzip the Successful Homeschool Mom Planner file and put it someplace easy to find like right on your desktop.
Step 1 –
Decide what layout will work best for your needs
Look over the modules and decide what you want to put on your page. What works best for your needs? Do you prefer a lot of room for daily notes?
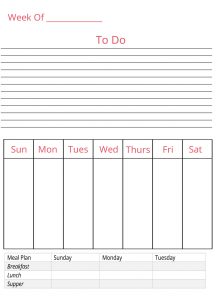
Do you want a full page weekly calendar, or do you need just a small spot to jot down a minimum of weekly events?
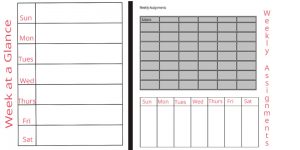
Do you want to make this mostly a lesson planner?
Or is this mom’s CIA (Central Intelligence Area) which acts like a central organizational structure for everything you do during the week?
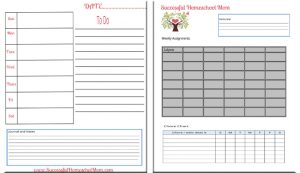
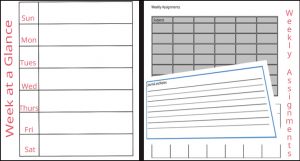
Maybe you want 52 weeks of the weekly planner page in the front of your notebook, followed by weekly calendar and to-do lists. There are so many options. Try whatever combination of modules you think might work, use it for a month and then try something new. Need even more room on a full page spread? Print out full sized Journal and Notes module, cut the page in half across the width and stick it in between the full size spread
Click here to get The Ultimate DIY Homeschool Planner Modules
As you look over the images in your Successful Homeschool Mom Planner file, you’ll see they look different from those sample pages above. I uploaded the images to a new document in Canva and enlarged or decreased their size, rotated them as needed and added the text I wanted right over them to make these sample pages.
Step 2 –
Open your photo editing program. I’m using Canva because it’s free, easy and does everything I need with a minimum of complicated editing tools to make things confusing, but you can use whatever photo program you are comfortable with. As long as you can combine several images on one page, and add text over them, it will work.
Login to Canva and click “create a design” On that page, scroll down and choose “letterhead”
This will give you an 8.5 x 11 inch blank page to work on.
Upload the images you want to use from the Successful Homeschool Mom Planner file, place them where you want them and rotate, or resize them to fit.
Click on the big T icon on the left side of your workspace and click and drag text boxes wherever you need them. Add your desired text and resize the box by clicking and dragging on the corners.
You can click on the “elements” icon and find backgrounds, images, icons and much more if you want to jazz up your pages. You can also upload whatever images you like from your own computer
Extra images –
Here’s the really fun part. Current brain research shows us that just looking at uplifting images for a few moments a day can help boost our spirits. What is your favorite view? A sunset over the ocean? Your recent family photos? A perfect flower blossom? All you need to do is import that image into your photo editor and add it to your page. There are several sample images in the Successful Homeschool Mom file to get you started. Note- the images are not super high resolution or the folder would have been too enormous for you to download. If you make the image larger than approximately 3”x3” on your page they will look blurry.
Once your design is complete, download it as a PDF and print. If you want a two page spread, make both the right and left hand pages, download them and print them back to back, You can three hole punch them and put them in a 3 ring binder.
I would love to see what you’ve come up with! Share them on our Facebook page Successful Homeschool Mom and let us know your favorite image editor software.
I reserve the right to delete anything offense or inappropriate.
Click here to get The Ultimate DIY Homeschool Planner Modules
Leave a Reply